Today's job is to install the flooring in the living room and dining room of our house. These rooms use a wooden board that clicks together. Some people call this hardwood flooring, but actually the wood we are using is Cork, and it is soft. It is pretty easy to install. I have to cut some pieces to the right length. And then they just snap together. I tap them with a hammer and board to make sure they snap together tight. I will show you how to do it in this video.
Now that the painting is done, we can start installing the tile flooring. We aren't doing tile everywhere, but there will be tile in the bathrooms and in the front entry. Also we are doing tile on the walls in one bathroom and above the counter top in the kitchen.
Before we can put tile on the floor, we put down a 1/4" sheet of plywood. This gets glued down so it stick to the other plywood that is already on the floor. The reason for more plywood is to make a 1" thick plywood floor that is solid and won't bend because if the floor flexes under the tile, the tile will crack or come loose, because tile doesn't bend.
After adding the plywood to the floor, we glue down the tile. We spread the glue with a notched trowel, and then put the tile in place.
After the tile is in place, we wait a few days for it to dry. Then we do the grout - grout is a type of mud that we put in the joints between each tile.
While the work is happening inside the house, we also need to get the outside finished first. There are three parts to the siding job. 1) Building Wrap
First a large sheet of a special paper call Typar wraps the whole house. This Typar wrap keeps water out, but lets air through so the plywood can stay dry. We installed this before we began insulating so that the insulation doesn't get wet.
2) Fascia, Soffit, Metal Clading
We used black metal for the Fascia, Soffit. This has to be installed before the siding.
We also had some other areas that used metal cladding, such as the posts on the deck and trim around the front windows and doors.
3) Siding
The siding can be done a bit later.
Our siding was a cocoa color. It comes in long sheets that snap together. There are also special corner pieces and trim for around the windows.
We left certain places of the front of the house where we didn't put siding because we are going to put stone there in the spring.
Now that we are at the painting stage, it is really starting to look like a house. We did three coats of paint on all the walls. Do you like my purple wall?
The drywall part of the job has 4 basic step: 1) Delivery
Drywall is so heavy and the sheets are large, so it is a big job to get the drywall into the house. Our drywall came on two big trucks and they used a special type of crane to lift the drywall up and bring it two a window. Then they put it inside the house through the window. Drywall is too heavy for me to lift, so I had to get help for this job.
2) Drywall Installation
Installing the drywall requires screwing it to the walls and ceiling. This is also a hard job that I couldn't do by myself.
We do the ceiling first:
Then we do the walls next:
3) Taping
The taping job is where they fill all the holes, cracks, and joints in the drywall to make it ready for painting. They call it taping because they use a drywall tape to cover the joint between each piece of drywall. After putting the tape on, we did two more coats of drywall mud to make it nice and smooth. After the mud dries, we sand it and then it is ready to paint.
4) Texture
We textured all the ceilings by spraying a type of mud through a hopper. First we paint the ceiling white, then spray the texture. When it is done, it leaves a nice texture that looks nice, and also helps to keep the house quiet.
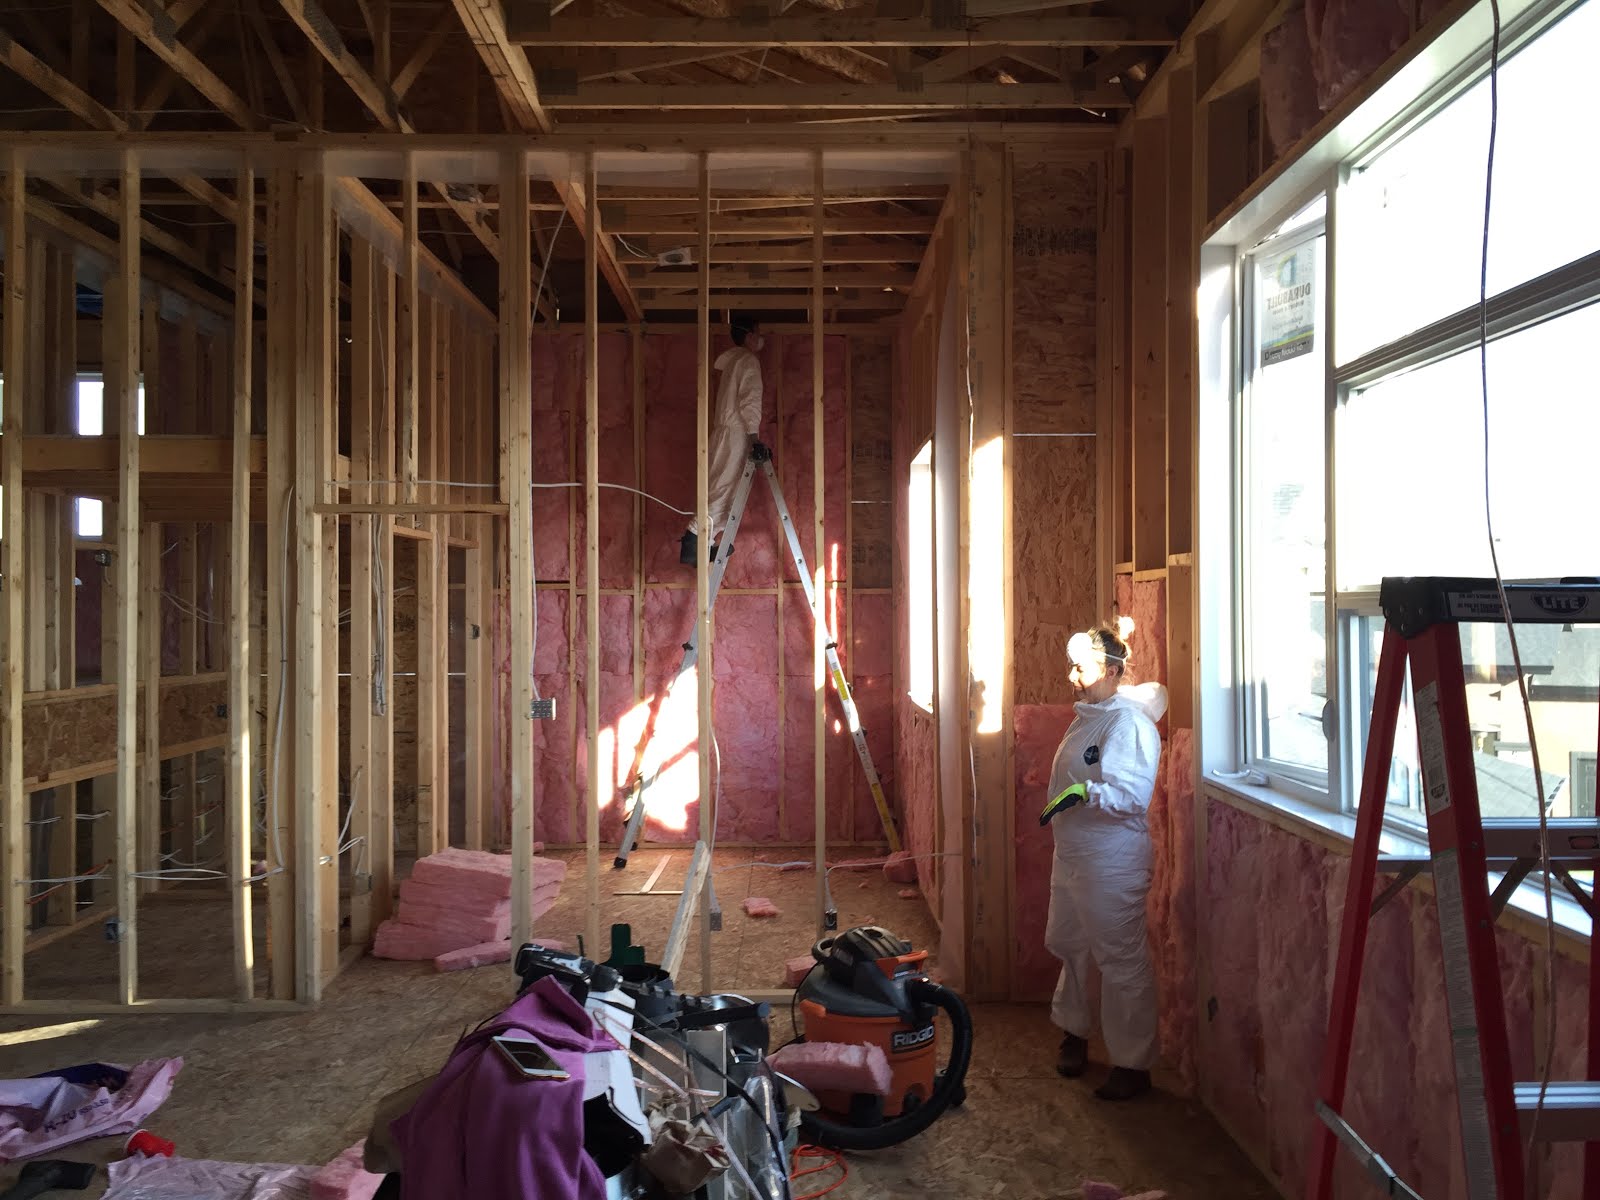
After the rough-in of the electrical, plumbing, and heating was done, we had it inspected. Then we have to insulate the walls to keep the cold out in the winter.
There are three parts to the insulation:
1) Wall Insulation
The insulation in the walls comes in a bag of rectangle pieces. They are easy to fit into the wall between the studs. Sometimes we have to cut them, but they are easy to cut too. The hardest part is they are itchy, so we wear white coverall suites to keep the itchy stuff off out skin.
It only took my team a couple of days to insulate all the walls in the house.
2) Vapor Barrier
The vapor barrier is a plastic sheet that we put on all the walls. This is to make sure no moisture can get through the wall. It also helps to keep the spiders out.
3) Attic Insulation
The attic insulation is different because we blow it in using a machine that sounds like a vacuum cleaner. This has to be done after the drywall (step 15) because the drywall holds the insulation up in the attic. Jamin helped me do the attic insulation.
HVAC stands for Heating, Ventilation, and Air Conditioning system. This is very important because I want to be warm in my new house. Our house has two furnaces - one for the basement and one for the upstairs. My brother Lucas helped me install the furnace and ductwork.
The plumbing Rough-in actually started at the beginning of the construction project. Some pipes had to be done before the concrete was poured.
Other pipes continued through the walls and floors to all the sinks, showers, and toilets. The big pipes are for the sewer or drains. The small pipes are for the water lines.

 Today's job is to install the flooring in the living room and dining room of our house. These rooms use a wooden board that clicks together. Some people call this hardwood flooring, but actually the wood we are using is Cork, and it is soft. It is pretty easy to install. I have to cut some pieces to the right length. And then they just snap together. I tap them with a hammer and board to make sure they snap together tight. I will show you how to do it in this video.