Today's job is to install the flooring in the living room and dining room of our house. These rooms use a wooden board that clicks together. Some people call this hardwood flooring, but actually the wood we are using is Cork, and it is soft. It is pretty easy to install. I have to cut some pieces to the right length. And then they just snap together. I tap them with a hammer and board to make sure they snap together tight. I will show you how to do it in this video.
Now that the painting is done, we can start installing the tile flooring. We aren't doing tile everywhere, but there will be tile in the bathrooms and in the front entry. Also we are doing tile on the walls in one bathroom and above the counter top in the kitchen.
Before we can put tile on the floor, we put down a 1/4" sheet of plywood. This gets glued down so it stick to the other plywood that is already on the floor. The reason for more plywood is to make a 1" thick plywood floor that is solid and won't bend because if the floor flexes under the tile, the tile will crack or come loose, because tile doesn't bend.
After adding the plywood to the floor, we glue down the tile. We spread the glue with a notched trowel, and then put the tile in place.
After the tile is in place, we wait a few days for it to dry. Then we do the grout - grout is a type of mud that we put in the joints between each tile.
While the work is happening inside the house, we also need to get the outside finished first. There are three parts to the siding job. 1) Building Wrap
First a large sheet of a special paper call Typar wraps the whole house. This Typar wrap keeps water out, but lets air through so the plywood can stay dry. We installed this before we began insulating so that the insulation doesn't get wet.
2) Fascia, Soffit, Metal Clading
We used black metal for the Fascia, Soffit. This has to be installed before the siding.
We also had some other areas that used metal cladding, such as the posts on the deck and trim around the front windows and doors.
3) Siding
The siding can be done a bit later.
Our siding was a cocoa color. It comes in long sheets that snap together. There are also special corner pieces and trim for around the windows.
We left certain places of the front of the house where we didn't put siding because we are going to put stone there in the spring.
Now that we are at the painting stage, it is really starting to look like a house. We did three coats of paint on all the walls. Do you like my purple wall?
The drywall part of the job has 4 basic step: 1) Delivery
Drywall is so heavy and the sheets are large, so it is a big job to get the drywall into the house. Our drywall came on two big trucks and they used a special type of crane to lift the drywall up and bring it two a window. Then they put it inside the house through the window. Drywall is too heavy for me to lift, so I had to get help for this job.
2) Drywall Installation
Installing the drywall requires screwing it to the walls and ceiling. This is also a hard job that I couldn't do by myself.
We do the ceiling first:
Then we do the walls next:
3) Taping
The taping job is where they fill all the holes, cracks, and joints in the drywall to make it ready for painting. They call it taping because they use a drywall tape to cover the joint between each piece of drywall. After putting the tape on, we did two more coats of drywall mud to make it nice and smooth. After the mud dries, we sand it and then it is ready to paint.
4) Texture
We textured all the ceilings by spraying a type of mud through a hopper. First we paint the ceiling white, then spray the texture. When it is done, it leaves a nice texture that looks nice, and also helps to keep the house quiet.
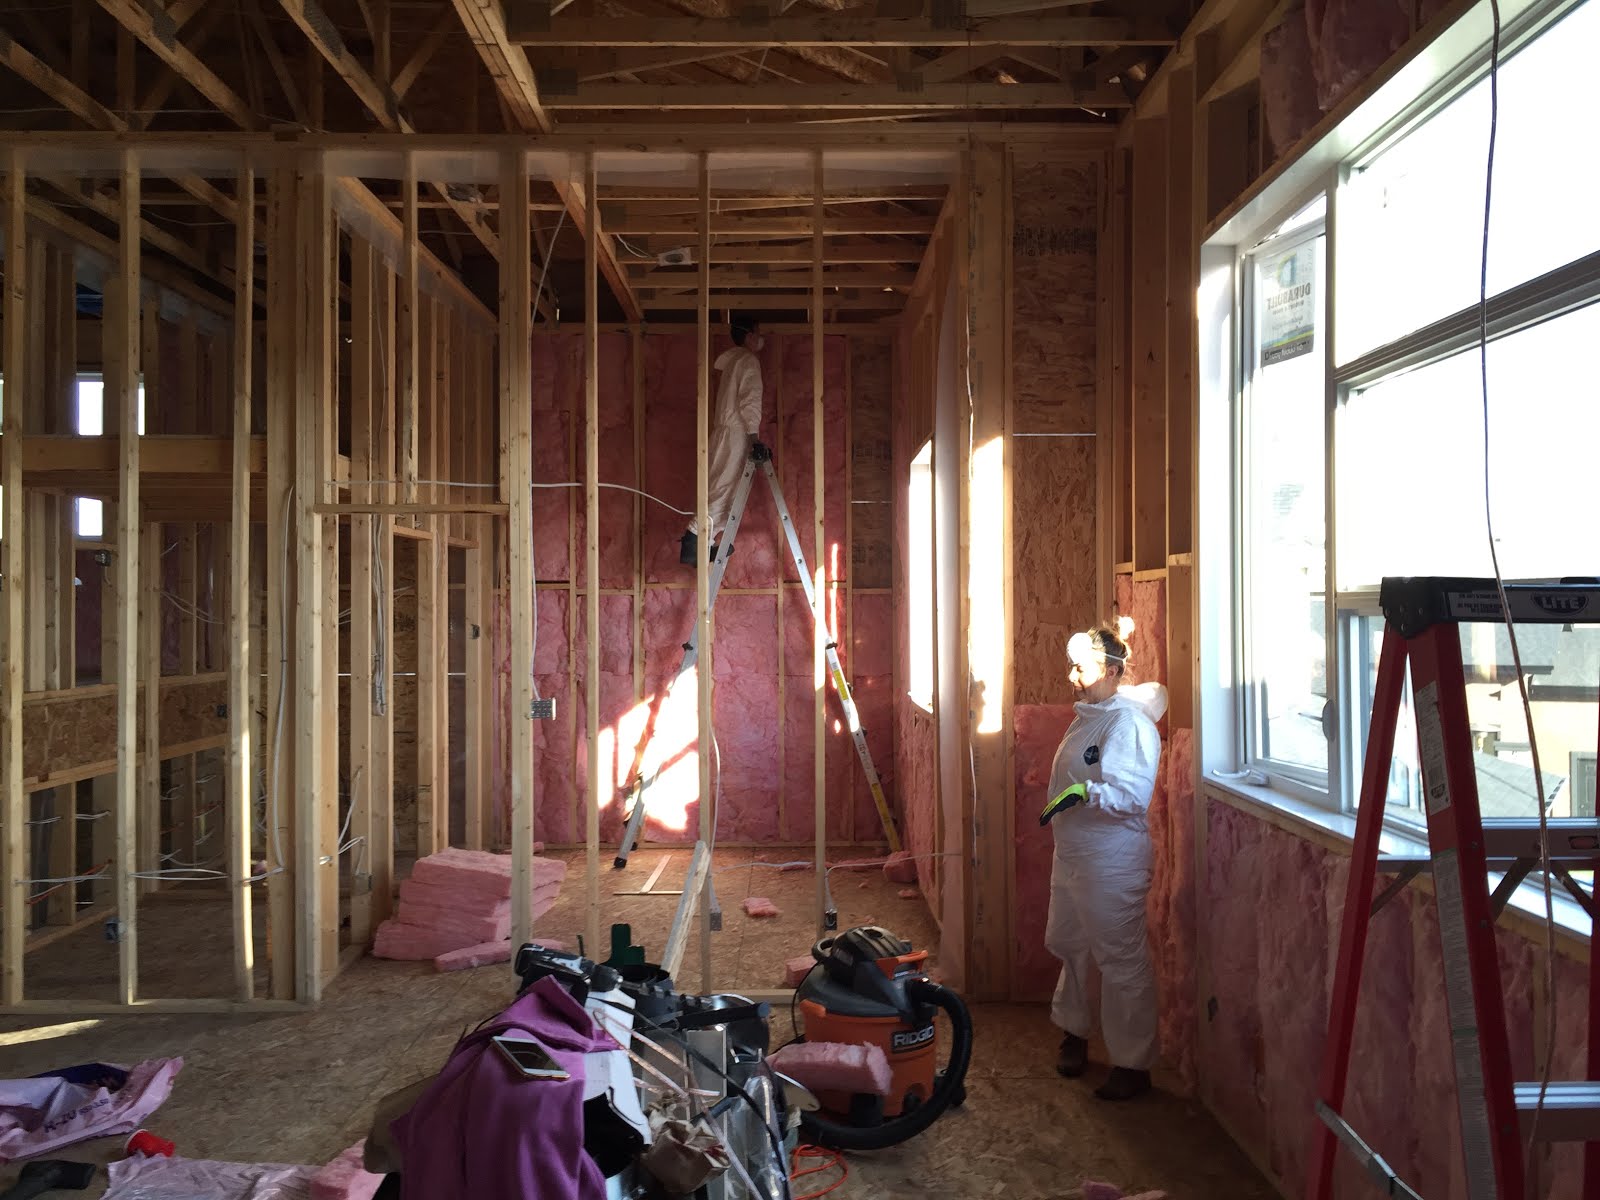
After the rough-in of the electrical, plumbing, and heating was done, we had it inspected. Then we have to insulate the walls to keep the cold out in the winter.
There are three parts to the insulation:
1) Wall Insulation
The insulation in the walls comes in a bag of rectangle pieces. They are easy to fit into the wall between the studs. Sometimes we have to cut them, but they are easy to cut too. The hardest part is they are itchy, so we wear white coverall suites to keep the itchy stuff off out skin.
It only took my team a couple of days to insulate all the walls in the house.
2) Vapor Barrier
The vapor barrier is a plastic sheet that we put on all the walls. This is to make sure no moisture can get through the wall. It also helps to keep the spiders out.
3) Attic Insulation
The attic insulation is different because we blow it in using a machine that sounds like a vacuum cleaner. This has to be done after the drywall (step 15) because the drywall holds the insulation up in the attic. Jamin helped me do the attic insulation.
HVAC stands for Heating, Ventilation, and Air Conditioning system. This is very important because I want to be warm in my new house. Our house has two furnaces - one for the basement and one for the upstairs. My brother Lucas helped me install the furnace and ductwork.
The plumbing Rough-in actually started at the beginning of the construction project. Some pipes had to be done before the concrete was poured.
Other pipes continued through the walls and floors to all the sinks, showers, and toilets. The big pipes are for the sewer or drains. The small pipes are for the water lines.
The electrical rough-in is a big job because we have to remember to put an electrical box wherever there is going to be a light or switch or plugin or any type of electrical device. Then we had to run wires between all the boxes and connect it back to the main electrical panel in the Garage. Finally, we are finishing up as I connect the wires to each electrical box. The electrical inspection is today, so I hope the inspector doesn't find anything wrong with my electrical work - we will see!
Today we poured the concrete for the basement floor. The concrete floor is so much cleaner then the mud and dirt that was there before. But before we could pour the concrete we had to make sure all the plumbing under the floor was completed and inspected. And then we had to put in an 8" layer of gravel and poly for vapor barrier.
Now that the concrete is done, we can start framing the basement walls and install the furnaces.
Now that the framing is done, it is time for roofing. The roof keeps the water out and it is important to get our house water proof as soon as possible so we can start doing more work inside.
Our roof starts with a layer of tar paper and then we nail down the shingles. These shingles are Dual Black colour in the Cambridge style. I like how they look.
The Framing began yesterday and it is progressing fast. We already can see the basement walls
around the basement and are ready to put the floor on them main level. Our framers use a crane to put everything in place. It is really cool.
July 12, 2016 UPDATE:
It has been 3 weeks of hard work, but the framing is almost done. Tomorrow we will start putting the trusses on. Check out the progress in this video:
The Backfill job is when they fill in the trench that was around the basement. When we do this we also try to get the ground nice and smooth. We had a little dirt left over but we will be using some of it if the ground sinks later.
One important thing to remember is you have to make sure everything around the bottom of the house has been completed and inspected before filling in the dirt.
Now that the backfill is done, we are ready to start framing the house!
Did you know weeping tile isn't actually tile? Why do they call it weeping tile? Actually they used
tile for this long ago, but now they use a flexible black pipe with small holes in it - I guess they forgot to change the name - so they call this pipe Weeping Tile.
The purpose of weeping tile is to catch any water on the outside of the house so it doesn't leak into the house.
There are 4 parts to the Weeping Tile job:
1- Spray tar on the concrete to make it waterproof
2- Place the pipe called Weeping Tile around the footings of the house
3- Pour lots of gravel on the Weeping Tile pipe so it doesn't get plugged with dirt
4- Install a tank below the basement floor for all the water to run into. Later we will install a pump in the tank to pump the water into the storm sewer.
With the basement walls finished, now it is time to connect the services to the house and run the sewer lines that will be under the concrete in the basement floor.
The services include Water, Sewer, Power, and Telephone.
The waterline is a flexable copper pipe that was coiled up in the dirt below the house. We dug that up and then need to unwrap it as we run it over to the mechanical room.
The main sewer line is a green pipe that is also under the house. We dug that up also and need to connect it to our new back-valve and then connect all the sewer pipes together and connect to the back-valve. We have to get this all finished before they pour the concrete floor in the basement.
The power and telephone lines were wrapped up in a box under the ground outside. We unrolled them around the house to where the power meter is going to be. Now we have to bury the cables with sand and then put a board on top to protect the cable in case someone tries to dig into it.
Today was another busy day on the house construction project. The
Cribbing crew started at 8:00 this morning. First they removed the
boards that were used to form the footings that were done yesterday.
Then a picker truck dropped off all these baskets of form plywood. Then
they spent the morning putting together the form plywood boards. At
1:00, the pump truck and 2 giant concrete trucks showed up and started
pumping the concrete into the walls. The walls are 5' high and 8"
wide. There is also 10M rebar in the wall. And on top of the wall,
there is a ladder shaped 2X4 that is embedded into the concrete. This
2X4 is to attach the walls to when the house is framed.
Tomorrow they will take off all the boards and cleanup so we will be able to see the finished concrete walls.
Footings are what hold up the house. They are made with concrete that is about 8" high and 16" wide
and have steel rods called rebar in it.
They use 2X6 boards to outline where the footings need to go. And then they get a big pump truck to pump the concrete through a big pipe to where it has to go in the footings. The big truck makes this job look pretty easy.
Today we finished digging the basement. We also connected the sewer pipes and dug a trench for the power and telephone cable.
The next job is to build the foundation with concrete and rebar.
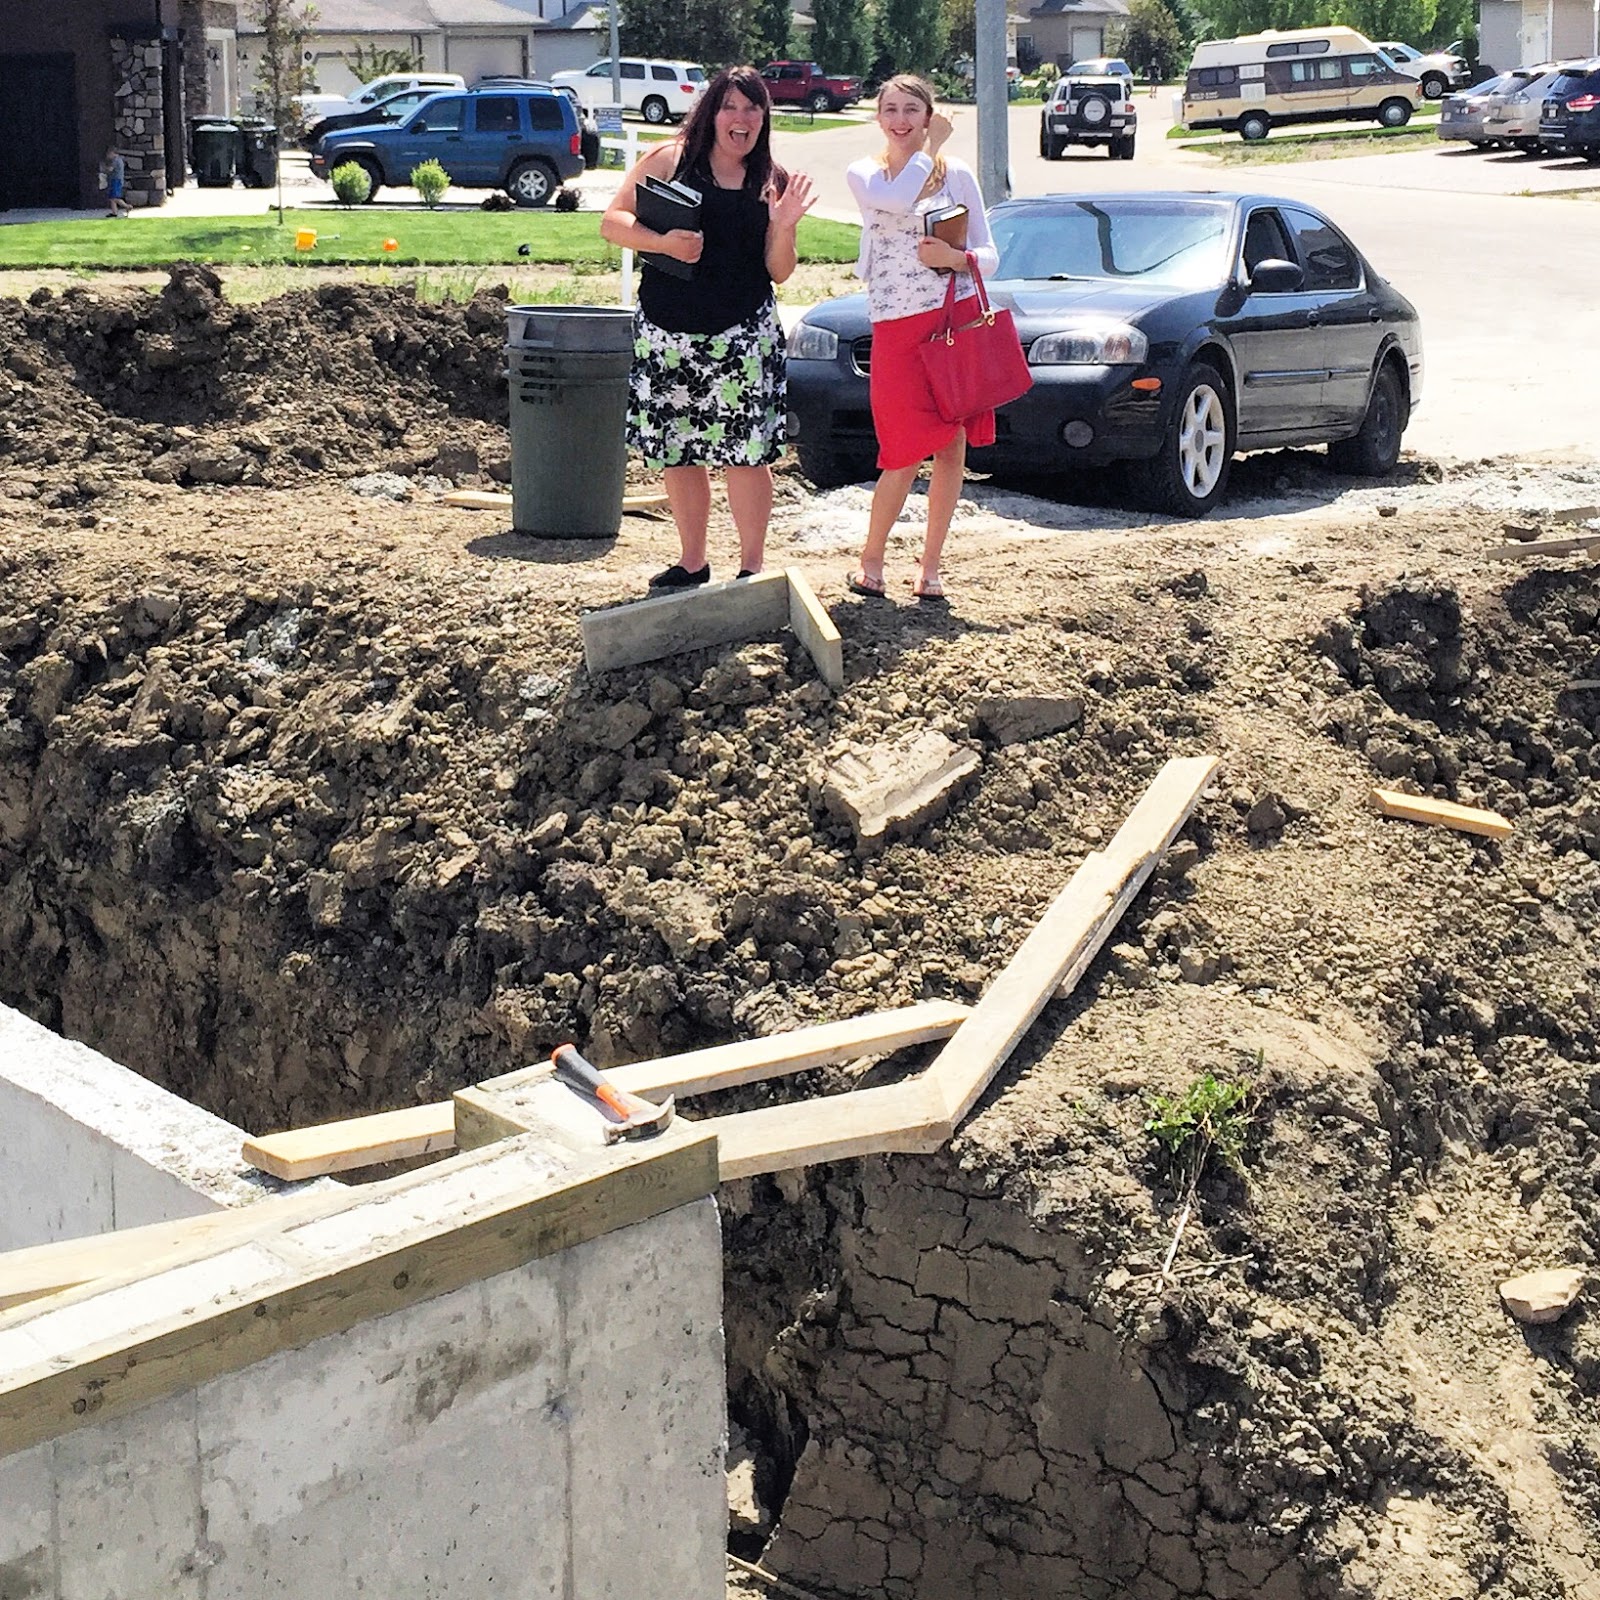
This year my family is building a house and I am here to tell you how we did it.
First my dad drew plans for the house. I told him what I wanted in my bedroom. After the plans were done he took them to the city office to get Permits. A permit means they give us permission to build the house.
After getting the permits, the Surveyors came out to our lot and put pink stakes in the ground showing where the basement will be. Now we just need to dig the hole in the ground!

 Today's job is to install the flooring in the living room and dining room of our house. These rooms use a wooden board that clicks together. Some people call this hardwood flooring, but actually the wood we are using is Cork, and it is soft. It is pretty easy to install. I have to cut some pieces to the right length. And then they just snap together. I tap them with a hammer and board to make sure they snap together tight. I will show you how to do it in this video.